Well, there is no stopping my husband, he is in the Halloween frame of mind and has started to shop for decorations for the yard. He said he has to buy when he sees the lawn decorations because if he waits too long they will sell out.
Okay I know that the early bird gets the worm but really wish that the retailers would not put out the Halloween decorations until August, I think it would be more fun to shop for everything that you need and then get busy with designing your outdoor decorations; layout and then set up at the end of summer.
So this week husband is organizing the garage and will pull out the Halloween orange plastic storage bins with locking lids that he got at target. Know that when it comes to Halloween decorations it is important to color code the storage containers that way you can find what you need faster than looking for a marking pen on the outside of a cardboard box.
We will check to make sure that the decorations/yard props are in working order and make a list of what is needed for repair, set up of prop enhancements. By starting in July for our Halloween celebration it gives us approximately 12 weeks to get everything staged in our front yard.
Know that I do love decorating the house and outdoors for Halloween and that I do it for the kids. I love to see their eyes twinkle and see them smile.
Celebrate the season of autumn with your family by reliving your childhood memories; sitting by the campfire, walking through a corn maze, exploring a nature trail, leaping into a leaf pile, decorating your home for the season and making comfort foods There are many fun family activities in autumn. So what are you waiting for? Plan an autumn activity of your home and family and have some fun. Here are some ideas.
Sunday, July 5, 2015
Getting Ready for Halloween
I am a gardener,writer, a graphic designer, photographer and feral cat colony caretaker
Thursday, July 2, 2015
Autumn in the Great Smoky Mountains
Normally I do no think of autumn in July but husband mention that
he would like to go to the smoky mountains this year to view the
fall colors and I know that I will need to make travel arrangements
if we expect to get a spot in a camp ground or a room at a hotel.
You really have to make your arrangements well in advance because everybody and their brother travels to the great smoky mountains to view the autumn scenery.
Here are some landscape photographs of the autumn season.
There are many beautiful areas in the US to view the autumn leaves, some people travel to New England, others to Vermont or North Carolina. Another one of my favorite destinations is hidden away in Arkansas, the city of Eureka Springs is spectacular during the fall season and many people travel to this city in the mountains to capture the beautiful scenery with their cameras.
Know that autumn is my favorite season and I am am really looking forward to our road trip this year to the great smoky mountains. Here is a video that will show you how gorgeous autumn is.
I am a gardener,writer, a graphic designer, photographer and feral cat colony caretaker
Monday, June 22, 2015
Neighborhood Halloween Decorating Contest
My husband is one to compete with our neighborhood for the BEST decorated Halloween house and today he came home from shopping and said that he saw Halloween products on the shelves at Hobby Lobby. This of course made him think that we should start planning for October festivities. I like the Halloween season also but think we need to enjoy the summer season and NOT start getting ready for Halloween.
In the past, Husband would start getting ready in August and I was okay with this since his projects were self-contained; in the garage and not on display in the yard...BUT June no way will I agree with him that it is time to get ready for the Halloween season.
Know that our neighborhood has an annual contest for the best-decorated yard for Halloween and every year my husband tries to win. He has been competing since 2007 but thus far has not won anything but has made kids smile and that means more than a prize plaque for the lawn
Photograph of Decorated house for Halloween |
In the past, Husband would start getting ready in August and I was okay with this since his projects were self-contained; in the garage and not on display in the yard...BUT June no way will I agree with him that it is time to get ready for the Halloween season.
Know that our neighborhood has an annual contest for the best-decorated yard for Halloween and every year my husband tries to win. He has been competing since 2007 but thus far has not won anything but has made kids smile and that means more than a prize plaque for the lawn
When getting ready for Halloween we make our yard decorations and buy pumpkins and corn stalks but this year husband has added inflatables; Halloween props and scenery to our yard. I think the kids will really like it and that the lighted props will make our home at the bottom of the hill more noticeable to trick or treaters in the neighborhood.
Do you decorate outdoors for Halloween?
Here are my designs for Halloween home decorations and more
See other gifts available on Zazzle.
Here are my designs for Halloween home decorations and more
See other gifts available on Zazzle.
Labels:
decorate Halloween,
Halloween
I am a gardener,writer, a graphic designer, photographer and feral cat colony caretaker
Autumn Leaves Covered in Snow
Today while looking at my photographs from last fall I came across the images that I took after the snow had fallen all day onto trees that had leaves. Yes it was a very early in season snow storm that had occurred before the leaves had fallen to the ground.
I went out at night to photograph the trees. They looked gorgeous covered in the white glistening snow but when the temperature changed the wet snow turned to ice and that is when there were problems. The branches that were on the trees that were not mature started drooping toward the ground, some trees and shrubs bent all the way over and were becoming uprooted. The snow, ice and leavers were too heavy for the branches and large branches from the mature trees were breaking and falling to the ground.
We could hear the crack and then hear the thud on the forest floor followed by a rumble. When it snows in early autumn while leaves are on the trees it creates a really dangerous situation. As I recall I took photographs of the trees from my patio, as I was fearful to walk into the yard due to the branches breaking.
Here is another photograph of mature oak tree that has leaves. This photo I took at night when the ice had formed around the leaves. what you are seeing in this photo is a combination of leaves, snow and ice. Taking photographs of nature in the fall season is fun, but it this situation I needed to be very careful.
I am a gardener,writer, a graphic designer, photographer and feral cat colony caretaker
Sunday, June 21, 2015
Putting Up Fresh Cherries For Fall Season
Last
week I harvested the ripe cherries from my tree and my harvest was
great. So I spent the entire day pitting the cherries for pie and
freezing the leftover cherries for fall season pies, muffins, and
cobblers. In
the past, my harvest has been small and there were never enough
cherries left over for putting up. But this year I thought it would
be really nice to have cherries on hand for pie in the fall.
I wasn't certain as to how to put up fresh cherries so I asked my husband, the chef, and he told me to wash the cherries in cold water, remove the stems, cut in half and take out the pit. Next get out your cookie sheets and line them with wax paper or parchment paper, I had parchment paper so that is what I used.
Set the half side up on the wax paper, the cherries are a single layer and they should not touch each other because they will freeze together. Freeze the cherries. When the cherries are completely frozen, in approximately 5 to 6 hours to be fully frozen, Remove the cherries from the freezer, then transfer them into freezer zip lock bags, or other product that has airtight seal. Then freeze the bagged cherries until they are needed for your fall recipes.
Know that getting fresh cherries ready for freezing, freezing them and then transferring them into freezer bags is not hard to do. BUT if you harvest the cherries in the morning and then follow all of these steps, you will be spending the entire day putting up your cherries. So why not make a fresh cherry pie on the same day that your prep cherries for freezing.
Personally while those cherries are freezing it sure would be nice to have a slice of pie.
I am a gardener,writer, a graphic designer, photographer and feral cat colony caretaker
Wednesday, February 18, 2015
Autumn Activities for Families with Kids Under Age 12
Autumn
is the time of year when the leaves turn to yellow and orange and the
days can be warm but the nights are cool to cold. It is the last
season before the bitter cold weather so our family always spends
quality time outdoors doing activities with the kids age 12 and
under.
Autumn is the season when the leaves change. Maple tree in full color. |
Here are a few autumn activities that my family enjoys
- On a sunny afternoon we make plans to go to a pumpkin patch. Pick out pumpkins for decoration and for carving into a Jack O'Lantern.
- Watch for the fall bazaars hometown then check out the activities, looking for the traditional autumn activities like pumpkin paintings, drinking apple cider, going for a hayride or enjoying roasting marshmallows on an open fire for s’more chocolate treats.
- Go on a bike ride on trails at a state park. Bike riding on an warm sunny autumn day is a great activity for the entire family. Bring along a picnic lunch and stop at a scenic overlook. Have fun during the autumn season by enjoying time well spent with our family.
- Plan a family day to rake a large pile of leaves then take turns jumping into the leaf pile.
- Another fun family activity is camping. Plan a night when the moon is full then sit around the campfire and sing songs or tell stories. Roast marshmallows and make happy family memories.Check your local newspapers for other activities in your area. Most communities offer a variety of events that feature family fun.
Nature trails in autumn are fun for walking or bike riding |
Go to a U-pick your own pumpkin, kids love this |
I am a gardener,writer, a graphic designer, photographer and feral cat colony caretaker
Tuesday, December 2, 2014
Favorite Peanut Butter Chocolate Cookies
When it comes to baking I like to make homemade cookies. Many of my made from scratch cookies start out with a basic recipe and then I add a little of this and a little of that.
Baking cookies apron by Sgolis
A few years ago my brother gave me the recipe for my mother's peanut butter cookie recipe and it was a good recipe but I did change it by adding the chocolate covered peanut butter morsels. Oh, my gosh these cookies are delicious and are now my families favorite peanut butter cookie.
This cookie tastes good any time of the year. Peanut butter and chocolate are delicious comfort foods. I hope that you enjoy the recipe
For this recipe you will need the following:
-
1 cup granulated sugar
1 cup brown sugar
1 cup shortening Crisco vegetable shortening or 1 cup of softened salt-free butter -
1 cup Smuckers Natural creamy or chunky peanut butter
2 eggs
A pinch of salt -
1 teaspoon vanilla
2 cups Hodgson Mill Organic unbleached organic all purpose flour
2 teaspoons baking soda -
½ cup of Nestle Toll House Delightfulls Milk chocolate morsels with peanut butter filling
-
-
With a mixer cream the sugar, with shortening or the butter then add the peanut butter, vanilla followed by the eggs.
-
Continue to beat on medium speed until the batter is smooth.
-
Add flour salt and baking soda and mix all ingredients well.
-
Mix in the chocolate peanut butter morsels with a spoon
-
Line the cookie sheet with parchment paper.
-
Drop the cookie dough by teaspoonful onto the parchment paper; space cookies two inches apart.
-
Use the back side of the fork to press down on the center of the cookies and to make the traditional indentation in the cookie tops.
-
Bake the peanut butter cookies at 375 for 10 minutes. Know the cookies are done by inserting a toothpick into the center of the cookie and pull out. If no batter is on the toothpick then cookies are done.
-
Let the cookies cool 10 minutes before serving.
Here is a gluten-free recipe for peanut butter cookies. Enjoy!
I am a gardener,writer, a graphic designer, photographer and feral cat colony caretaker
Saturday, November 8, 2014
Easy Autumn Floral Centerpiece Instructions
One of my clients had asked me if I could make an autumn centerpiece for her. She had seen one at Hobby Lobby that she liked but did not want to pay the asking price. She had many craft items as well as an assortment of silk and dried autumn flowers and grasses.
I went to Hobby Lobby and looked at the centerpiece. I could make it and so I accepted the contract. My out of pocket was minimal and compensation was more than enough considering I had fun making the autumn floral centerpiece.
I made the floral arrangements as seen on my clients table |
For this project I used:
2- Already made craft dowel vases from the craft store
Florist craft dry foam
Florist tape
Natural craft raffia 8 ounces of long strong fibers
2 bouquets of assorted wildflower and sunflower matching bouquets
Dried stems of thistle, wheat, and assorted grass plumes
Hot glue gun
To make this arrangement I cut a piece of dry florist foam and taped in the bottom of the wood vase. I used the florist tape to wrap around the silk bouquet and naturally dried accents. This ensured that the flowers would stay gathered in the bouquet and would not separate.
Add natural dried grasses to the arrangement |
In order to keep the flower stems from dropping hot glued them before I inserted them into florist dry foam. It is best to put the stems into the center of the foam. When the glue is dry and flower are secure then work with the flowers and grass stems to make them look pretty. I decorated this arrangement with a raffia bow. Wrap the raffia around the vase several times. The raffia bow will face to the front with long ties. Keep the raffia in place by using your hot glue gun to attach the wrap to the woodcraft vase.
And you are done. I hope you will enjoy making this pretty autumn centerpiece.
I am a gardener,writer, a graphic designer, photographer and feral cat colony caretaker
Recipe for Herbal Soap
In the autumn season I will harvest a variety of aromatic herbs to use in my wreaths and for making soap.
I am not a soap expert as I have only been making herbal soap for the last two years. However I like that is is another way that I can put good use to my herbs that I grow. I really love aromatic herbal soaps because the scent is refreshing in the bathroom and in the kitchen.
You can make herbal soap anytime of the year but for me I usually make in the autumn season because that is when I harvest my herbs.
You will need the following:
- A glass microwave bowl
- Dried herb leaves and flowers
- Buy from craft store, plain glycerin soap.
- A grater to shave the glycerin soap or you can cut soap with sharp knife
- Buy essential oils to add fragrance to your soap. (Example I am making Chocolate mint soap. I will use chocolate and peppermint essential oil.) I am hoping the finish product will have the scent of a peppermint patty.
- Soap molds
- Wood mixing spoon and rubber spatula
For one bar of
glycerin herbal soap you would do the following;
- Grate or cut the soap finely
- Melt the soap shavings in a microwave bowl for 30 seconds on high, Stir with wooden spoon and repeat for another 30 seconds until the soap is completely melted.
- When the glycerin soap is melted, remove from the heat and set aside.
- Add 1 tablespoon of dried aromatic chopped herb leaves and flowers (you choose the herbs that you want to use). Also add 1 teaspoon of essential oil.
- Mix the liquid soap and herbs and essential oil with wooden spoon.
- Spray your soap molds with Crisco olive oil.
- When soap and dried herbs are blended you would then pour into soap molds.
- Use your rubber spatula to remove the soap from the bowl.
- Set the soap mold on the counter for thirty minutes to allow it to harden at room temperature.
Complete the soap
hardening with a cold process. Put the soap mold in the freezer for twenty five
minutes. Remove the soap from the freezer and remove from the soap mold.
Set the soap on wax
paper and allow it to continue to harden in a cool dry place for 24 hours.
Note: If I am going
to give the soap as a gift I will add the herbal flowers as a whole toward the
top of the soap because they look pretty.
View how to make soap on YouTube
Labels:
craft activity soap
I am a gardener,writer, a graphic designer, photographer and feral cat colony caretaker
Apple Pear Chutney with Cranberries
In the autumn my family harvests the pears and the apples and my job is to come up with recipes for the bushes of fruit. I make the traditional things like apple-pear pie, apple-pear sauce, apple-pear muffins but this year we also made apple pear and cranberry chutney.
My husband helped me to get the fruit ready for the chutney and the day before we peeled and cored a bushel of apples and pears. When the peeling was done husband chopped all of the fruit and then slow cooked the fruit; apples, pears with granulated sugar, cinnamon, apple cider vinegar, apple juice and water.
The fruit cooked on the stove for several hours. Then when the fruit was almost done my husband added the dried cranberries. When chutney was done the sauce had thicken around the chopped fruit. We never made apple pear cranberry chutney before and thought the blending of the fruit was delicious.
Labels:
apple,
autumn,
easy recipe,
home cooking,
pear chutney
I am a gardener,writer, a graphic designer, photographer and feral cat colony caretaker
Sunday, October 19, 2014
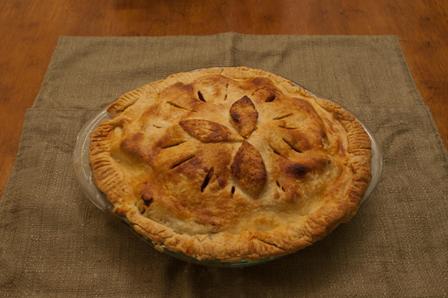
Elderberry Apple Pie Recipe
In the fall when the weather turns cool I enjoy
baking fresh berry and fruit pies. One
of my favorite pies is apple elderberry.
This recipe is not one you are going to find at your weekly recipe meet because I came up
with it because my husband likes apple pie and I like elderberry so I mixed the fruit so we both had a pie we would enjoy.
I grow elderberries in my yard for the birds
but always take from the bush for my autumn recipes. In august I harvested elderberries
by cutting off the dark blue black clusters with my garden scissor and then I
put the berry cluster in a colander to wash off before freezing.
Fresh elderberries are messy; the juice
stains and is nearly impossible to get out so I always freeze before using. When I back with elderberries I always add them to recipe when they are frozen.
Gather ingredients for pie recipe:
2 Cups of fresh elderberries (I use fresh berries that I froze)
4 Cups of peeled, cored and apples
3 Tablespoons of all purpose flour
½ Teaspoon of cinnamon
1 Cup granulated sugar
2 Tablespoons of salt free butter
2- 9 Inch pie crust
4 Cups of peeled, cored and apples
3 Tablespoons of all purpose flour
½ Teaspoon of cinnamon
1 Cup granulated sugar
2 Tablespoons of salt free butter
2- 9 Inch pie crust
Here is the recipe
for elderberry-apple pie:
Add the apples, flour, and sugar to the bowl and mix all ingredients. Then add the frozen elderberries and mix gently to avoid breaking the berries.
Line your pie plate with the pie crust and then pour the apple and elderberry filling into the crust. Top the pie filling with the second pie crust and pinch the top and bottom crusts together. Use a fork to create steam release holes in the top of the crust. Then pat the crust with the butter.
Your oven should be preheated to 450 degrees Fahrenheit and oven rack should be put in the center.
Bake your pie at 450 for ten minutes and then turn the heat down to 400 and bake pie for one hour.
Test to see if the pie is done by inserting a toothpick in the center if the toothpick comes out clean then the pie is done.
Let pie cool before serving then garnish the pie with freshly whipped cream or a scoop of vanilla ice cream . My husband enjoys his pie with Andy’s frozen vanilla custard. It sure is good and is the perfect ending for a autumn day.
Labels:
apple pie,
elderberry pie,
pie,
pie recipe
I am a gardener,writer, a graphic designer, photographer and feral cat colony caretaker
Saturday, September 27, 2014
Easy Pumpkin Chocolate Muffin Recipe
It is definitely pumpkin recipe season and if you like pumpkin as much as I do then you will really like this easy pumpkin walnut muffin recipe because I add a secret ingredient that is so delicious.
Last year I made the cake mix pumpkin muffins that had 3 ingredients and muffins were moist but I thought a little bland, So this year I did some experimenting with the flavor and came up with a recipe that I love.
This pumpkin muffin recipe is easy but oh so delicious because I am adding walnuts and secret ingredient is white chocolate. When the chocolate bakes it melts into the texture of the muffin and when you bite into the muffin they melt in your mouth.
I made a batch of these muffins a few weeks ago and served at my women's group and the girls said they were delicious and suggested that I serve them as a cupcake with white chocolate frosting and garnished with chopped walnuts. They are perfect for a Halloween open house or served for brunch or afternoon snack throughout the autumn season
See how nice the pumpkin muffins look of Halloween buffet table.
All I can say is that pumpkin walnut with chocolate muffins or cupcakes sure are good. Here is my recipe for pumpkin white chocolate muffins.
For
this recipe you will need the following:
18.25
ounce yellow cake mix
1 can 15-ounce pumpkin puree
1/2 teaspoon
pumpkin pie spice
1 teaspoon of ground cinnamon
1/4 cup chopped
walnuts
1/4 cup white chocolate morsels
Recipe
steps:
• Preheat the oven to 350 degrees Fahrenheit.
• Spray the 12 cup muffin pan cups with Pam for baking with flour or use paper liners.
• Combine the cake mix with the pumpkin puree and spices in a large mixing bowl.
• With an electric mixer set at medium blend all ingredients until batter is smooth.
• With spoon fold nuts and white chocolate morsels into the batter.
• Fill the muffin cups 2/3 of the way to the top with the batter.
• Bake for 20 minutes.
• Check to see if muffins are done by inserting a toothpick into the center. If the toothpick comes out clean then this is an indication that the muffins are cooked and need to come out of the oven.
• Cool for 20 minutes on a wire rack.
This is your basic pumpkin muffin cake mix recipe, with less spice and the addition of walnuts and white chocolate.
My
family enjoys these muffins and I hope your family will also.• Preheat the oven to 350 degrees Fahrenheit.
• Spray the 12 cup muffin pan cups with Pam for baking with flour or use paper liners.
• Combine the cake mix with the pumpkin puree and spices in a large mixing bowl.
• With an electric mixer set at medium blend all ingredients until batter is smooth.
• With spoon fold nuts and white chocolate morsels into the batter.
• Fill the muffin cups 2/3 of the way to the top with the batter.
• Bake for 20 minutes.
• Check to see if muffins are done by inserting a toothpick into the center. If the toothpick comes out clean then this is an indication that the muffins are cooked and need to come out of the oven.
• Cool for 20 minutes on a wire rack.
This is your basic pumpkin muffin cake mix recipe, with less spice and the addition of walnuts and white chocolate.
Labels:
easy recipe,
pumpkin muffins,
pumpkin recipe
I am a gardener,writer, a graphic designer, photographer and feral cat colony caretaker
Sunday, August 10, 2014
Yummy Vegetable Casserole that Kids Love
My family
consists of picky eaters and I have to hide their vegetables in chocolate zucchini cake or conceal in cheese to get them to eat any nutritious foods. So when I found one of my mother’s recipes
for a cheesy
vegetable casserole for adults I knew I could modify it and make it more
appealing for kids.
Cheesy casserole for kids, ready to bake |
This comfort
food casserole is perfect for holiday gatherings; Thanksgiving and or Christmas
and a good choice for an open house or anytime when you want a hearty casserole
that tastes like comfort food.
This recipe
is so yummy and your kids will want a second helping; they will think it is
good and will never know that it is made with vegetables.
You will
need the following ingredients:
- 10 ounce package of frozen mixed chopped vegetables; peas, carrots, string beans and corn are a good mix.
- 1-1/2 cups of Velveeta cheese
- 1 can cream of cream of mushroom soup (do not dilute)
- ½ cup PET evaporated milk
- Can of French fried onion rings
- Season with salt and pepper to taste
Here is the
recipe:
- You will need a two quart baking dish or glass casserole to make this vegetable recipe. Grease the pan with extra virgin olive oil.
- Cut up the Velveeta cheese and put in a microwave safe bowl. Melt in the microwave.
- In a large mixing bowl add the frozen mixed vegetables, salt and pepper mushroom soup, evaporated milk and 1 cup of the cheese.
- Mix all of the ingredients together. Pour into your baking dish.
- Top with the remaining cheese and then the French Fried Onion Rings.
- Bake 350 for 25 to 30 minutes, let cool for 10 minutes before serving.
I am a gardener,writer, a graphic designer, photographer and feral cat colony caretaker
Monday, October 8, 2012
Chocolate Peanut Balls - Candy Recipe
This
scrumptious chocolate candy recipe is from my mom’s recipe book. In the autumn season a few weeks before
Thanksgiving my mother would start to make an assortment of sweets. She would fill up decorative holiday tins with
chocolate candies and set them aside. These candy tins would then be handed out
to coworker, neighbors and friends as seasonal gifts of care and to say thank
you.
Chocolate
candy is always well received when you add to a dessert tray at an autumn open
house. These nutty chocolate balls also
make a nice afternoon snack with a cold glass of milk
You
will need:
1
cup of semisweet chocolate morsels
2
tablespoons butter
1
egg
1
cup sifted powder sugar
½ teaspoon
of vanilla
½ cup
flaked coconut for recipe
½ cup
flaked coconut for garnish
½ cup
chopped peanuts
Instructions
for chocolate peanut balls
Photo by Jeremiah Shilhavy |
In a
heavy medium sized saucepan melt the chocolate and the butter, heat at
low. Stir the chocolate sauce so that it
does not burn. When the chocolate is
melted remove the pan from the heat and let it set until it is warm to the
touch but not hot.
Using
an electric mixer beat the egg into the chocolate until the batter is
smooth. Add the sifted powder sugar and
fold into the chocolate mixture with spoon.
Add the vanilla and mix into the batter. Stir in the coconut and the peanuts. Using a spoon mix all of the ingredients well.
Chill
the chocolate candy mixture in the refrigerator for one hour. Take a teaspoon of the candy mixer and using
your hands roll the candy into a one inch ball.
Add ½
cup of flaked coconut to a zip lock bag.
Set the rolled chocolate candy ball in the bag of coconut and gently toss. Garnish the outside of the nutty candy ball
with the flaked coconut.
Set
the candy ball on a baking sheet. Refrigerate the chocolate peanut balls for one
hour before serving. This recipe makes
30 pieces of candy.
Tips:
This
is an easy recipe that you can make with your children. Candy making is a fun activity for a cool
autumn day.
Store
candy in an air-tight container in a cool dry place and it will keep for
several weeks.
Learn how to melt chocolate by viewing this YouTube video:
Other chocolate and peanut candy recipes:
Labels:
chocolate candy recipe,
chocolate peanut balls rolled in coconut,
fun candy recipe for children,
peanut balls recipe
I am a gardener,writer, a graphic designer, photographer and feral cat colony caretaker
Subscribe to:
Posts (Atom)